Table of Contents
- 1 🌶️ What Makes Hatch Chile Salsa Special?
- 2 🥣 Why You’ll Love This Recipe
- 3 🍅 Ingredients for Roasted Hatch Chile Salsa
- 4 🔥 How to Roast Hatch Chiles
- 5 🌀 How to Make Roasted Hatch Chile Salsa (Step-by-Step)
- 6 🌮 Ways to Use Roasted Hatch Chile Salsa
- 7 ❄️ Storage Tips
- 8 🌱 Make It Your Own – Variations
- 9 ❓ Frequently Asked Questions
- 10 🛒 Where to Buy Hatch Green Chiles
- 11 🧡 Wrap-Up: A Salsa That Screams Summer Flavor
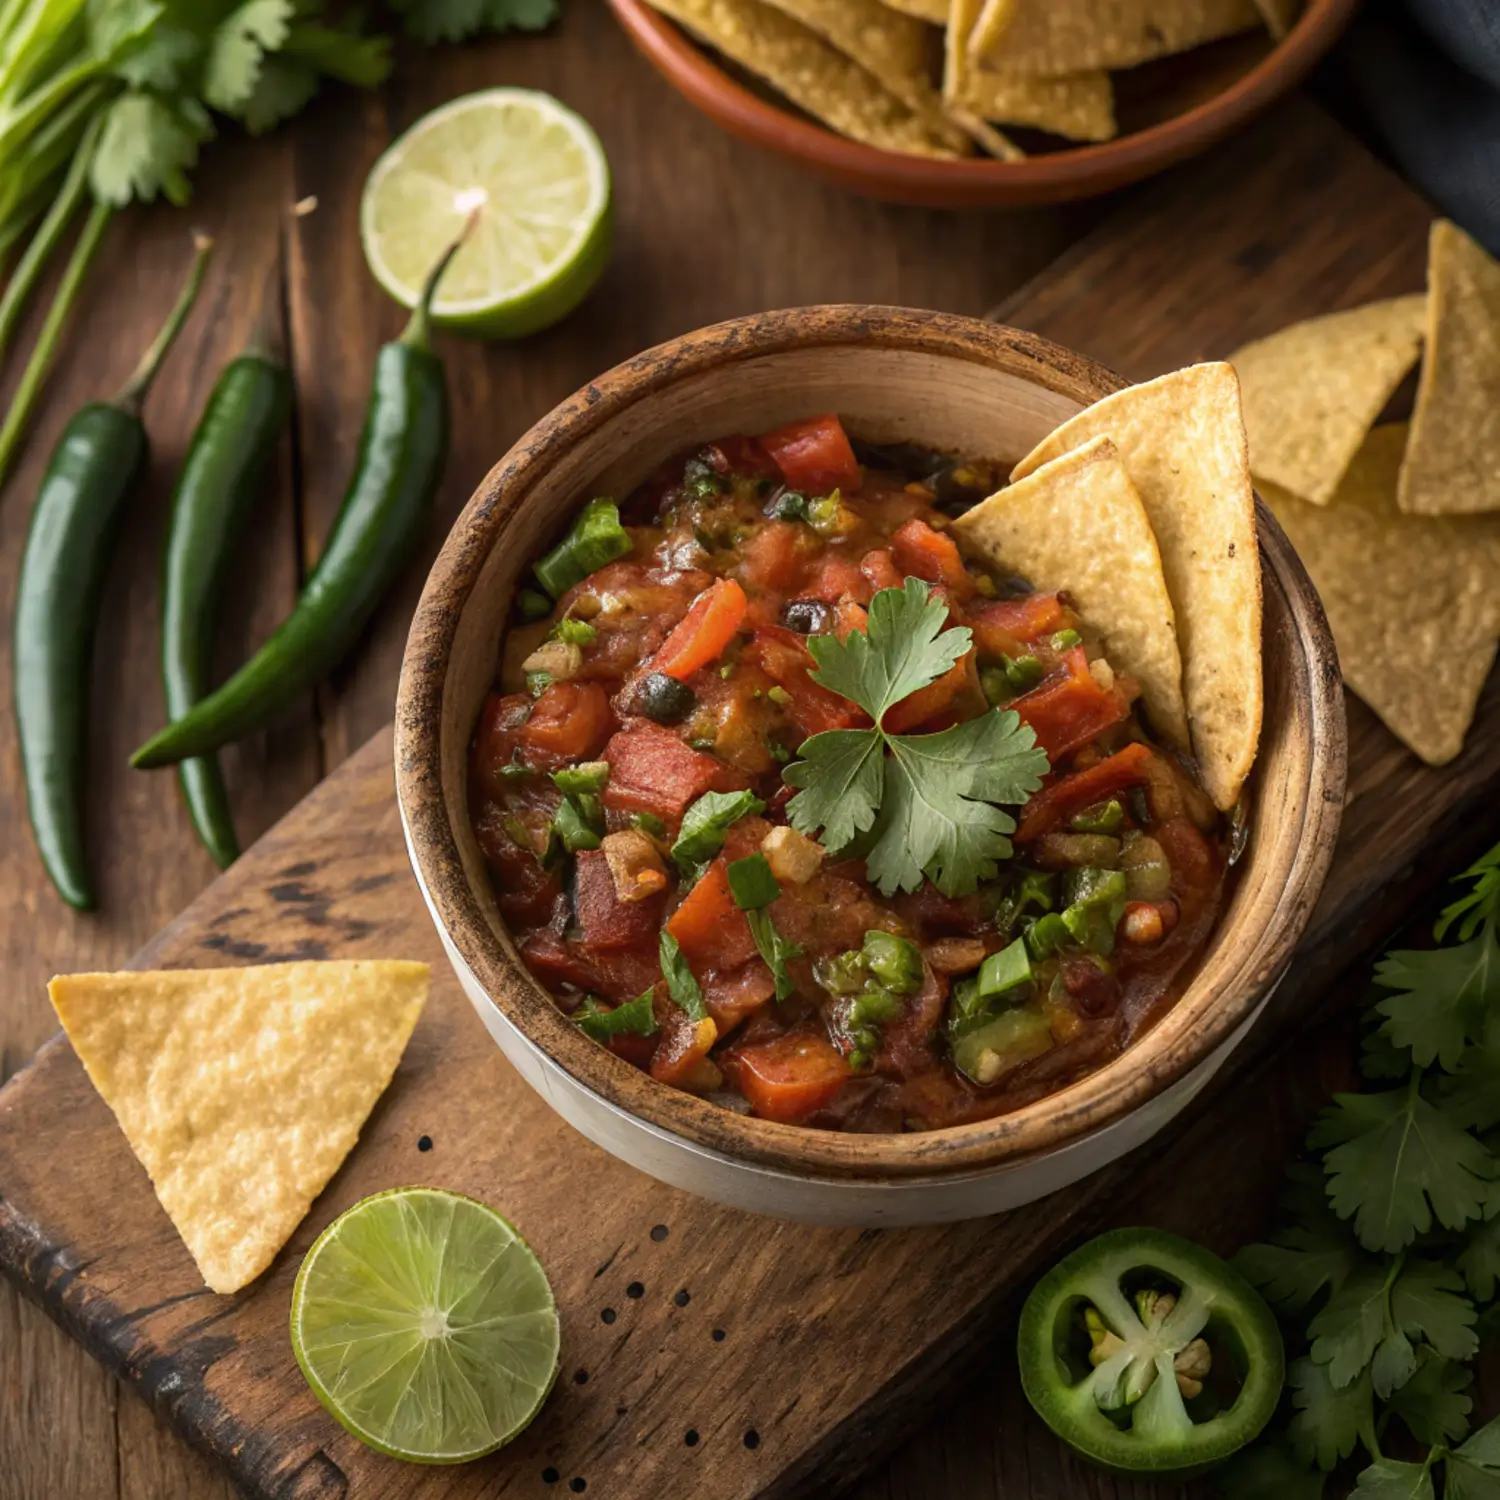
Nothing captures the bold, smoky essence of late summer quite like Roasted Hatch Chile Salsa. This fiery, flavor-packed dip combines the earthy heat of Hatch green chiles with juicy tomatoes, aromatic garlic, and fresh lime juice to create a salsa that’s vibrant, zesty, and addictively good.
Whether you’re serving it with tortilla chips, spooning it over tacos, or stirring it into your morning eggs, this homemade Hatch chile salsa delivers unbeatable flavor and freshness. It’s quick to make, easy to customize, and the perfect way to celebrate Hatch chile season in August and September.
🌶️ What Makes Hatch Chile Salsa Special?
Hatch chiles are more than just another green pepper. Grown in the Hatch Valley of New Mexico, these chiles are prized for their:
-
Rich, smoky flavor when roasted
-
Medium heat level (some hotter varieties exist)
-
Versatility in sauces, soups, dips, and salsas
Roasting enhances their natural sweetness and adds depth to any dish. When blended with roasted tomatoes, onion, garlic, and lime juice, they become the foundation of an unforgettable homemade salsa.
🥣 Why You’ll Love This Recipe
-
🔥 Fresh, smoky, and spicy
-
🕒 Ready in under 30 minutes
-
🥑 Perfect for chips, tacos, grilled meats, and more
-
🌱 Vegan, gluten-free, and low-carb
-
🌶️ Customizable spice level
Whether you’re preserving Hatch chiles from your local farmer’s market or using the canned version, this salsa adds bold flavor to any summer table.
🍅 Ingredients for Roasted Hatch Chile Salsa
Here’s what you’ll need to whip up a batch of this smoky salsa:
Fresh Ingredients
-
4–6 Hatch green chiles (fresh, roasted & peeled)
-
4 medium Roma tomatoes (or 1 can fire-roasted tomatoes)
-
1 small white or yellow onion, quartered
-
3 cloves garlic, peeled
-
1 jalapeño (optional for extra heat)
-
1 tbsp olive oil
-
1 tsp cumin
-
1/2 tsp salt, more to taste
-
Juice of 1 lime
-
1/4 cup fresh cilantro (optional)
🌶️ Can’t find fresh Hatch chiles? You can substitute 1 cup of canned Hatch chiles (fire-roasted preferred).
🔥 How to Roast Hatch Chiles
If you’re using fresh Hatch green chiles, roasting them is key to unlocking their full flavor.
H3: Roasting Methods
1. Oven Broil Method
-
Preheat broiler to high.
-
Place chiles, tomatoes, onion, and garlic on a baking sheet.
-
Broil for 5–7 minutes per side, turning occasionally, until charred and blistered.
2. Gas Stove Method
-
Place chiles directly over gas burner flame using tongs.
-
Rotate until charred on all sides.
3. Grill Method
-
Preheat grill to high heat.
-
Grill chiles and other veggies until blistered and softened.
🔥 After roasting, place chiles in a bowl and cover with plastic wrap for 10 minutes. This makes the skin easy to peel.
🌀 How to Make Roasted Hatch Chile Salsa (Step-by-Step)
Step 1 – Roast the Veggies
Roast the Hatch chiles, tomatoes, onion, and garlic using your chosen method. Let them cool slightly.
Step 2 – Peel & Prep
Peel the skin off the roasted chiles and remove stems and most seeds (leave some for heat). Do the same for the tomatoes if desired.
Step 3 – Blend Everything
Add the following to a food processor or blender:
-
Roasted Hatch chiles
-
Roasted tomatoes
-
Roasted garlic and onion
-
Jalapeño (if using)
-
Lime juice, olive oil, cumin, and salt
-
Cilantro (optional)
Pulse until desired consistency—chunky or smooth.
Step 4 – Taste and Adjust
Taste and adjust salt, lime juice, or heat level. Let the salsa chill for 30 minutes before serving for best flavor.
🌮 Ways to Use Roasted Hatch Chile Salsa
This salsa is a multi-use flavor bomb. Try it:
-
As a dip for tortilla chips
-
Over grilled chicken or steak
-
In burritos, quesadillas, and tacos
-
Swirled into scrambled eggs or omelets
-
As a base for enchilada sauce
-
Mixed into guacamole or sour cream for spicy dips
❄️ Storage Tips
-
Fridge: Store in an airtight container for up to 5 days.
-
Freezer: Freeze in freezer-safe bags or jars for up to 3 months. Thaw in the fridge before using.
🌱 Make It Your Own – Variations
| Ingredient | Swap or Add-On Idea |
|---|---|
| Tomatoes | Use tomatillos for a tangier salsa verde |
| Cilantro | Leave out or add parsley if you dislike it |
| Jalapeño | Substitute with serrano for extra heat |
| Lime Juice | Try lemon or add orange juice for sweetness |
| Olive Oil | Omit for oil-free version |
❓ Frequently Asked Questions
What’s the difference between Hatch chiles and poblano peppers?
Hatch chiles have a more distinct earthy, smoky flavor and are typically spicier than poblanos. They’re grown only in Hatch, New Mexico.
How spicy is this salsa?
It depends on the heat level of your Hatch chiles. Mild to medium chiles are typically used, but you can always remove seeds or add extra peppers like jalapeño to adjust.
Can I can this salsa?
Yes—but follow a tested canning method with proper acidity adjustments. This recipe is best for fresh use or freezing unless you’re familiar with safe home canning techniques.
Can I make it chunky instead of smooth?
Absolutely. Simply pulse your food processor a few times for a rustic, chunky texture.
Is it gluten-free and vegan?
Yes! This salsa is naturally gluten-free, dairy-free, and vegan.
🛒 Where to Buy Hatch Green Chiles
During August and September, look for:
-
Local farmer’s markets in the Southwest
-
Grocery stores like Whole Foods or Sprouts
-
Online retailers (fresh, roasted, or canned)
Tip: Buy extra and freeze them for use year-round!
🧡 Wrap-Up: A Salsa That Screams Summer Flavor
If you’re craving something bold, spicy, and incredibly fresh, this Roasted Hatch Chile Salsa will hit the spot. It’s the perfect way to embrace Hatch chile season and add a Southwestern kick to any meal. Roasting the chiles takes this from good to gourmet—and once you try it, you’ll be making batch after batch.
Make it for taco night, game day, or just because you have chips lying around. Either way, it’s guaranteed to be a hit!